


Once you have downloaded the Aduro Pellet Stove app and connected your stove to the network following the guide: How to connect the Aduro pellet stove to app and Wi-Fi · Customer Self-Service, you can begin using the app to control your stove.
Your stove will appear on the main screen in the app, as shown below:
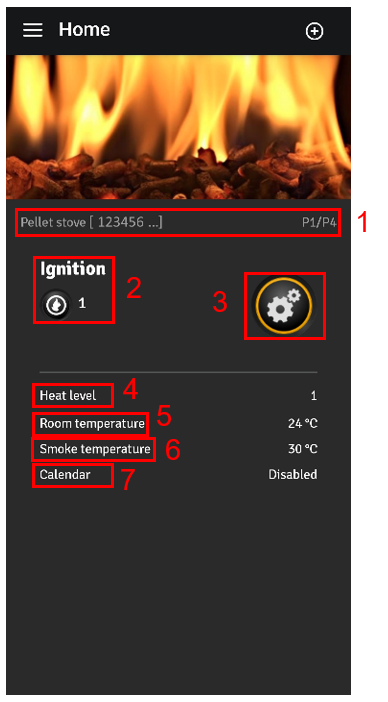
- Pellet stove Wi-Fi serial number & model
- Status
- Menu/Settings
- Heat level
- Current room temperature (measured by the stove)
- Current smoke temperature (measured by the stove)
- Calendar (Disabled or Enabled)
To turn on your stove, press the button: (settings) and then select:
(start).
In the settings, you can, in addition to turning the stove on and off, adjust the heat level, set the desired room temperature, and enable or disable the calendar function.
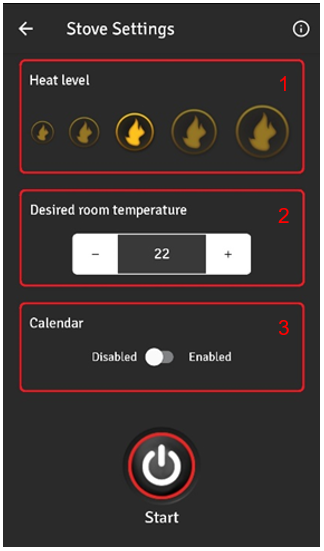
- Heat level: There are five different heat levels available, allowing you to choose the one that best suits your heating needs.
- Desired room temperature: You can set your preferred room temperature by pressing the – or + buttons. The stove will automatically adjust to maintain the selected temperature.
- Calendar: The calendar function can be enabled or disabled. To set up the function, please refer to the stove’s control panel or remote control.
Account settings and language preferences can be accessed by tapping the three horizontal lines (menu icon) in the main menu:
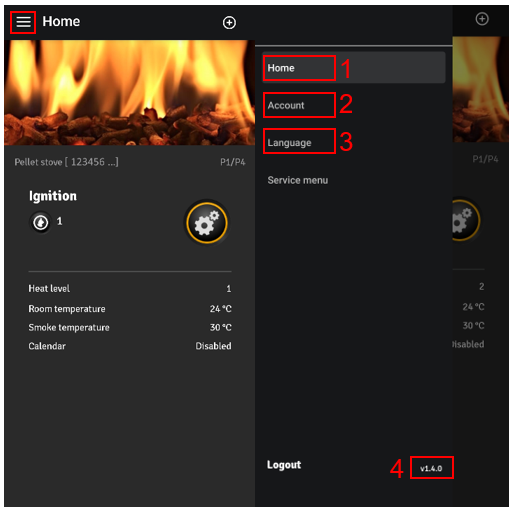
- Home: Returns you to the app’s main page where you can view and control your stove.
- Account: Allows you to edit your personal information or permanently delete your account
- Language: Choose your preferred language for the app.
- App Version: Displays the current version of the app