


Difficulty level: Intermediate
Time consumption: 30 minutes
Tools: Bits screwdriver, TORX bits, Hex bits, Spanner set
Components: Control panel for Aduro P1/P4 (Control panel incl. cable)
⚠ All changes and adjustments must be conducted when the stove is cold and disconnected from the power supply.
⚠ This guide is recommended for professional craftsmen.
Accessing the control panel
To access the control panel, the top plate must first be removed. Follow these steps:
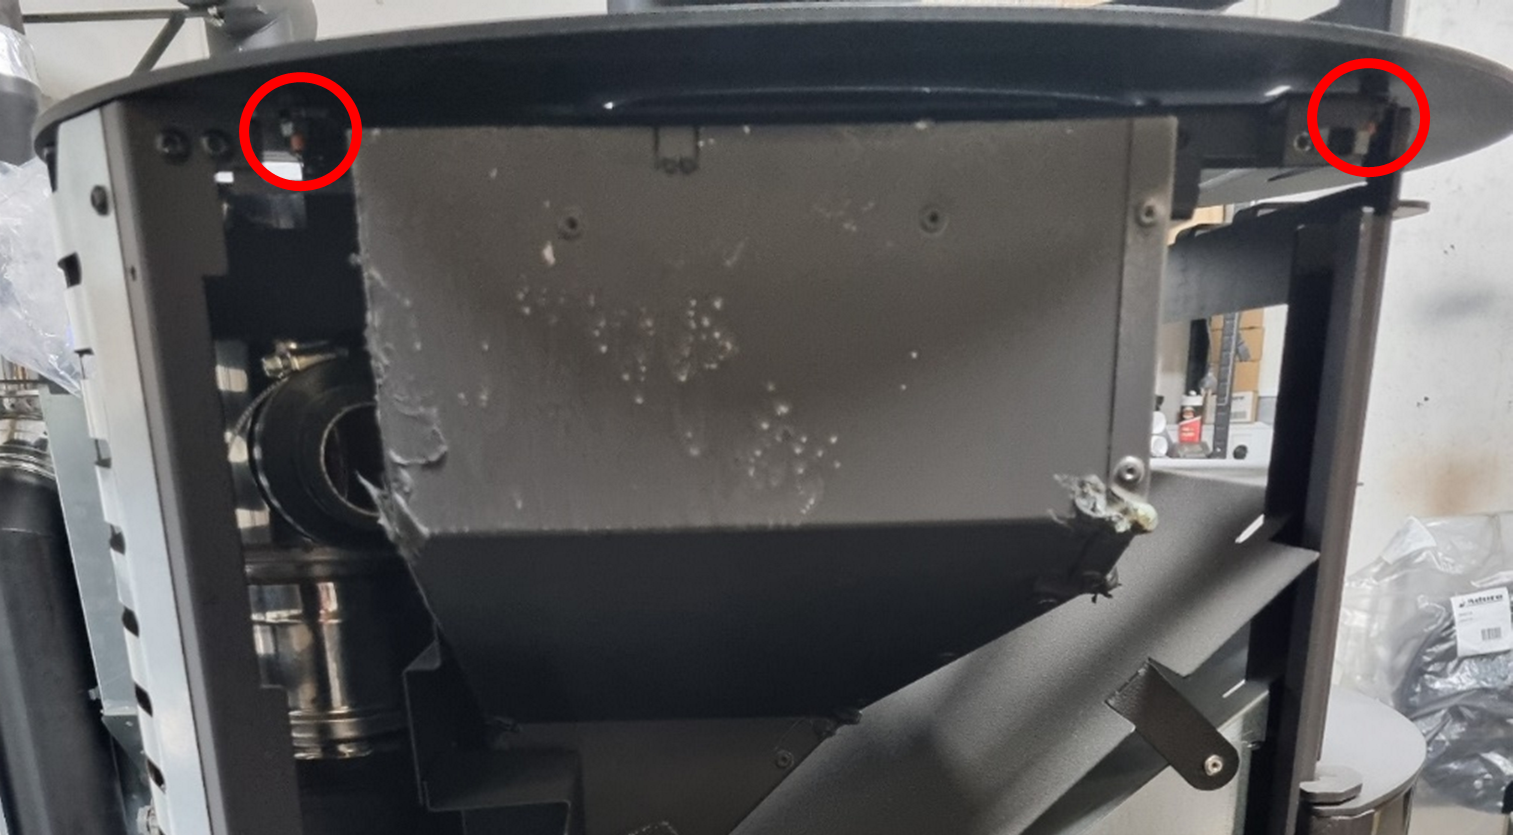
1. Unscrew the two screws located underneath the front top cover to remove it.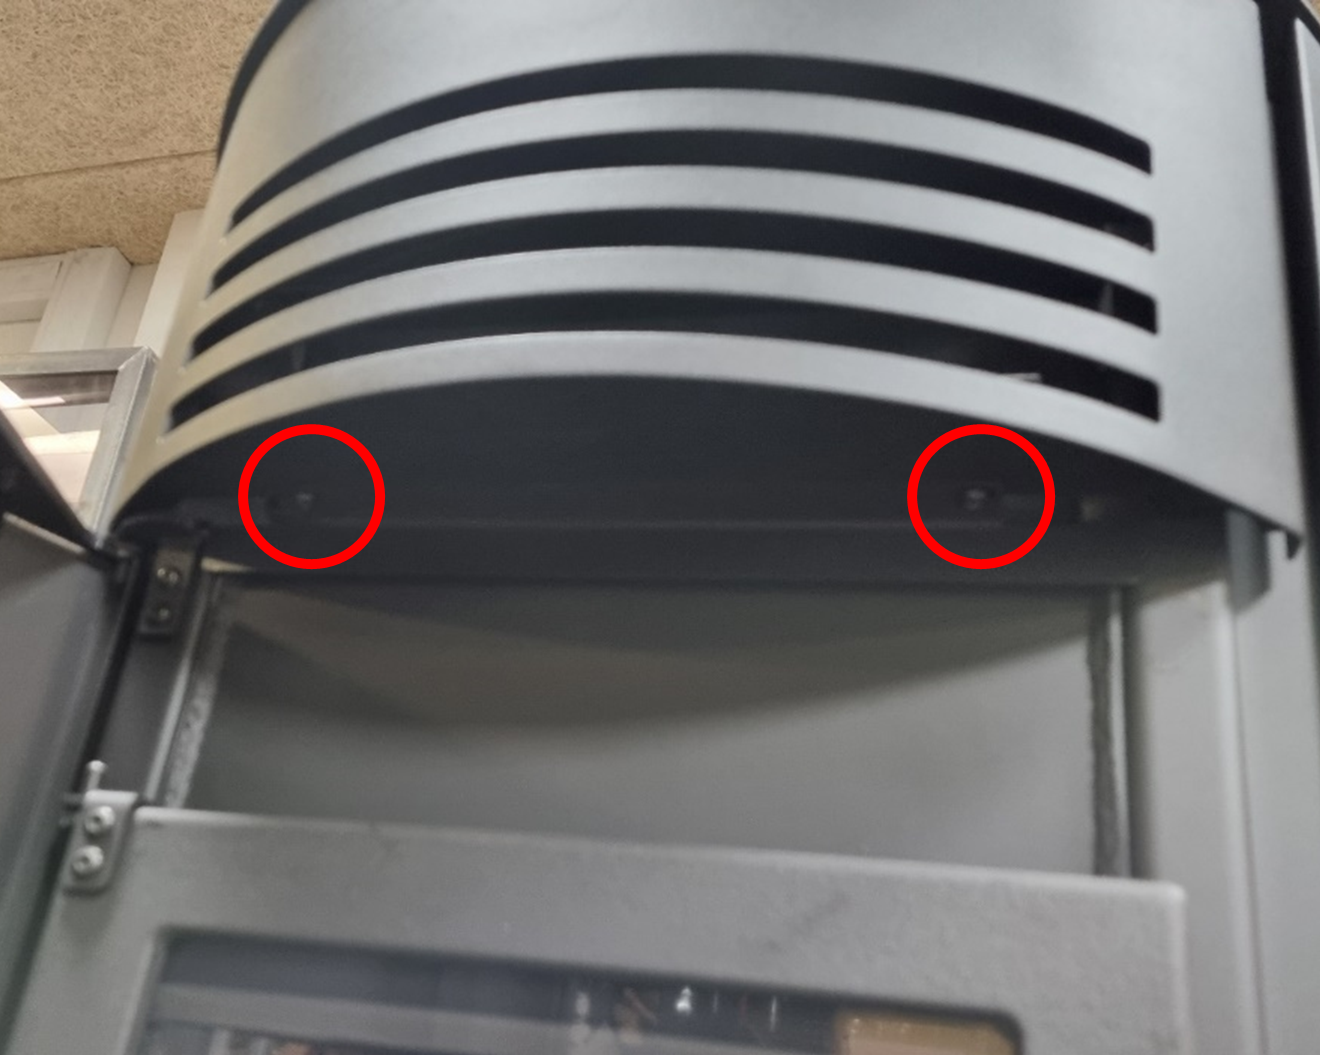
2. Unscrew the screws at the back and remove both side panels.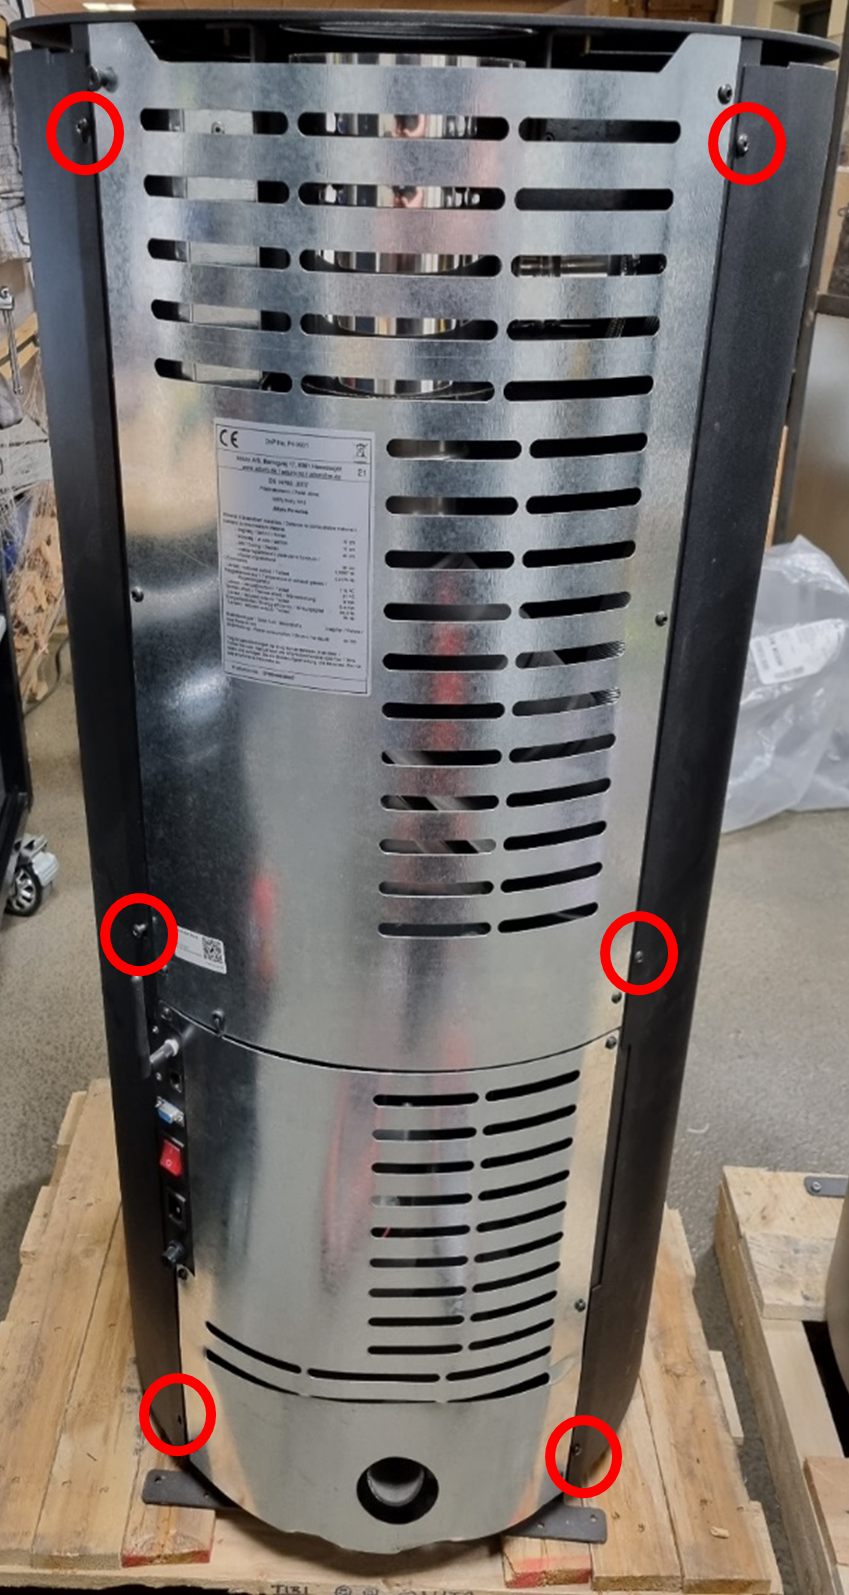
3. From the underside of the top plate, 8 nuts need to be removed (as shown in the image of the underside of the top plate).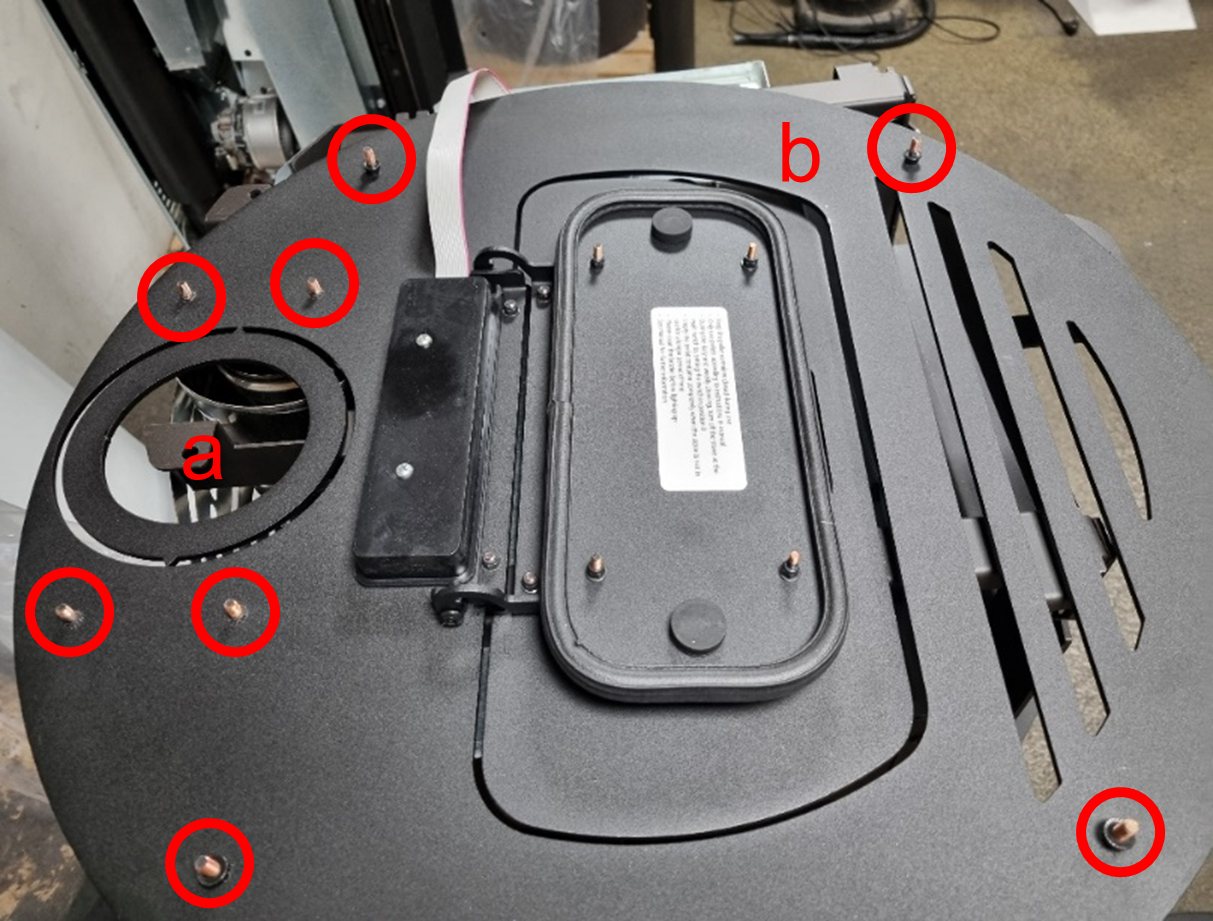
- Remove the 6 nuts securing the back flue pipe support.
- Remove the 2 nuts from the sides.
4. Carefully lift the top plate and turn it over. It is recommended to place it on a piece of cardboard on top of the stove to prevent damage.
Replacing the control panel
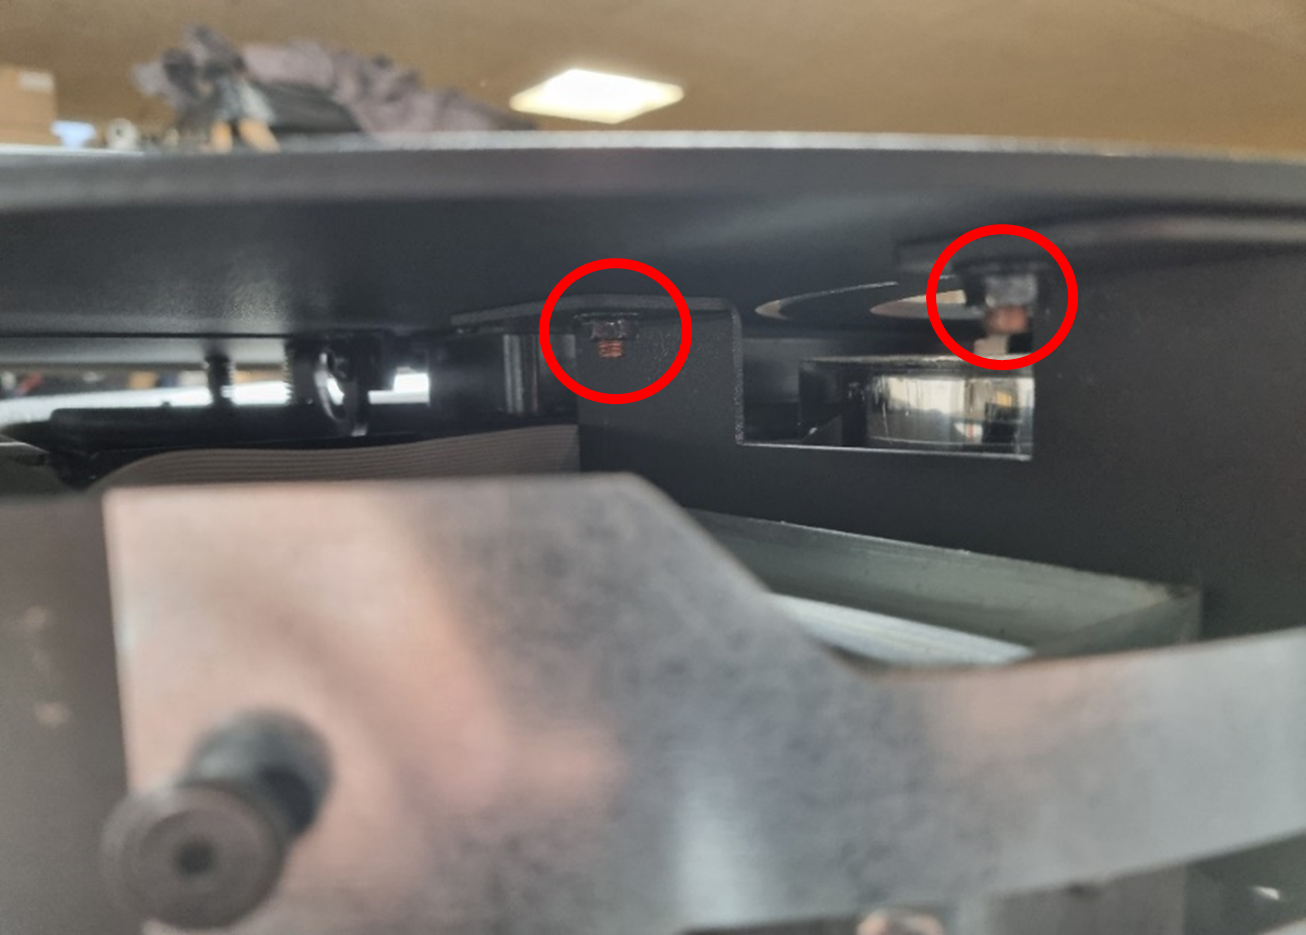
1. Unscrew the two screws securing the backplate of the control panel.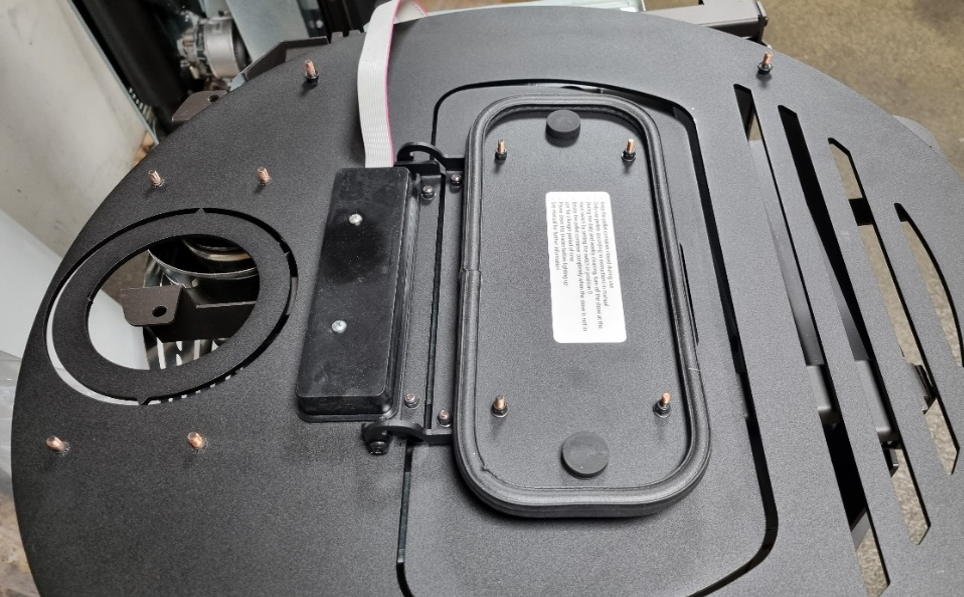
2. Disconnect the cable from the control panel.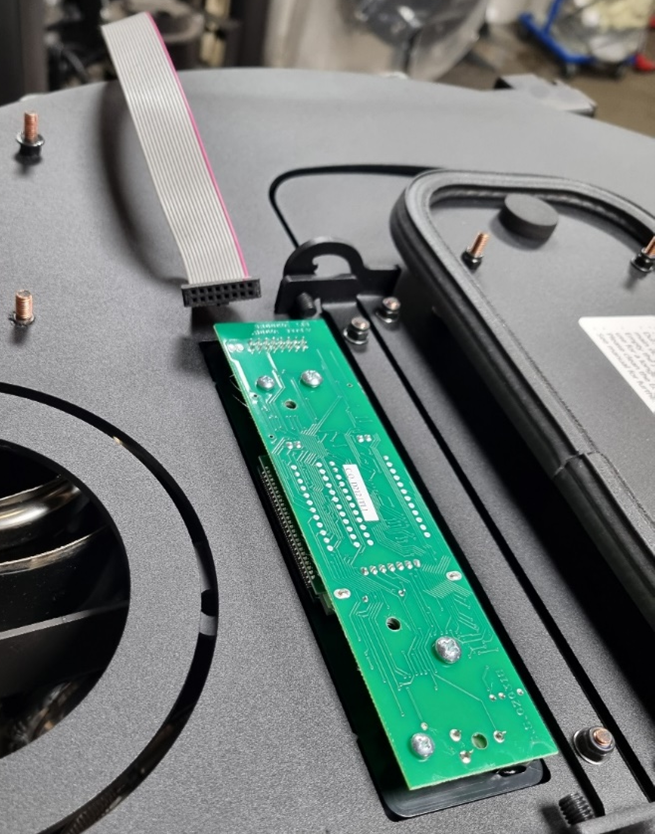
3. Separate the components of the new control panel to prepare for installation.
4. Lift the top plate again, remove the remaining part of the old control panel, and replace it with the corresponding part from the new control panel.
5. Reattach the backplate to the back of the control panel, from the bottom side of the top plate, and mount the screws.
6. Reassemble the stove by following the steps in reverse order.
The installation is now complete.