


Difficulty level: Easy
Time consumption: 15 minutes
Tools: Allen key 4 mm, TORX 20 screwdriver, PH 2 screwdriver
Components: Convection fan (aduroshop.com)
NB: All changes and adjustments must be conducted when the stove is cold and disconnected from the power supply.
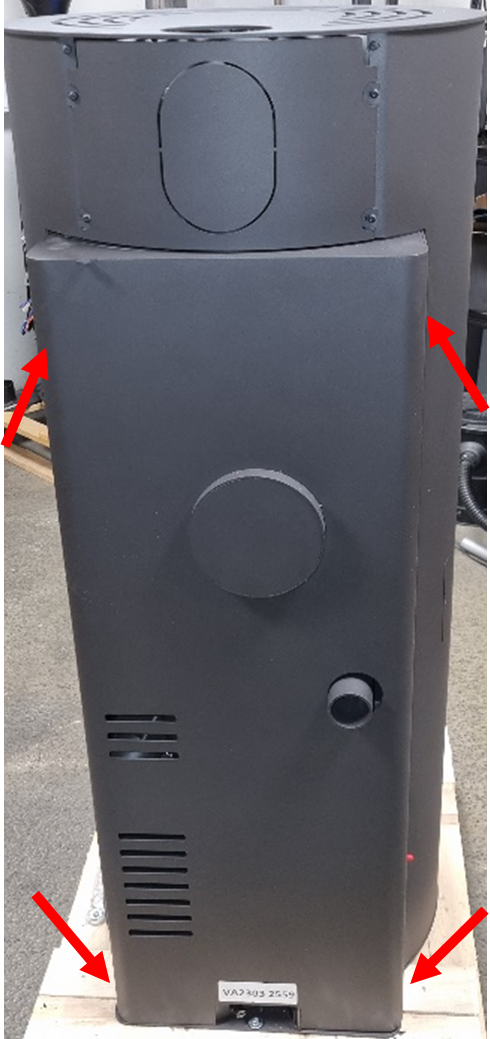
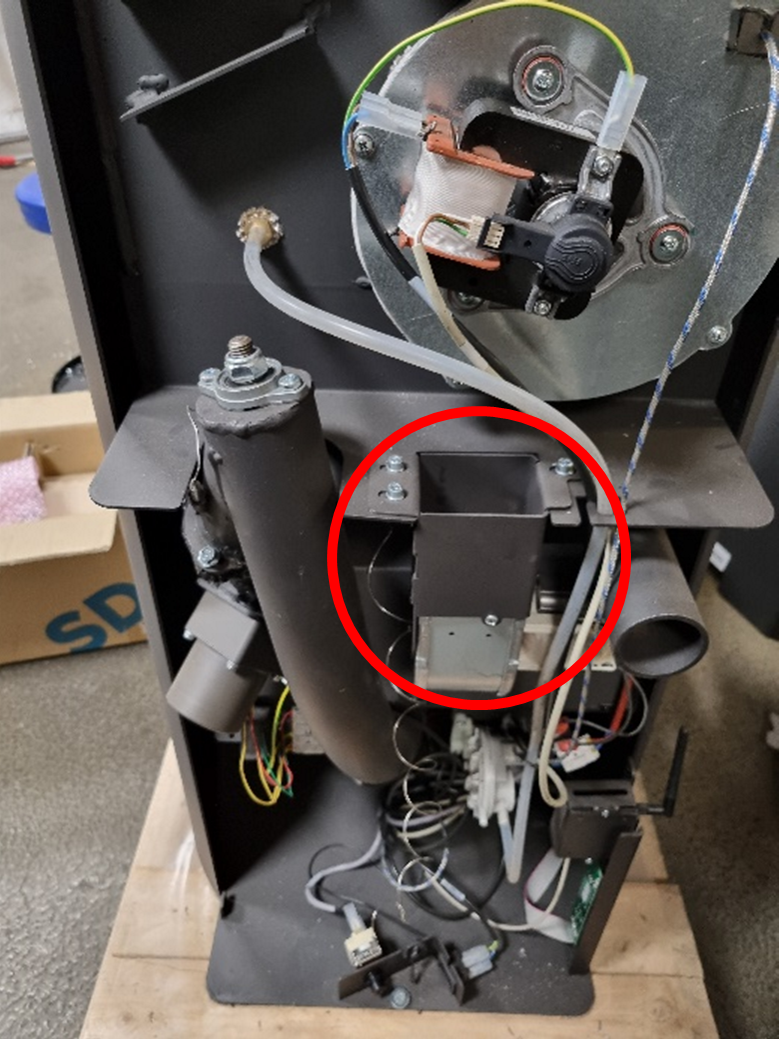
- Unscrew the four screws on the stove’s backplate with a TORX 20 screwdriver and remove the backplate. Then locate the convection fan:
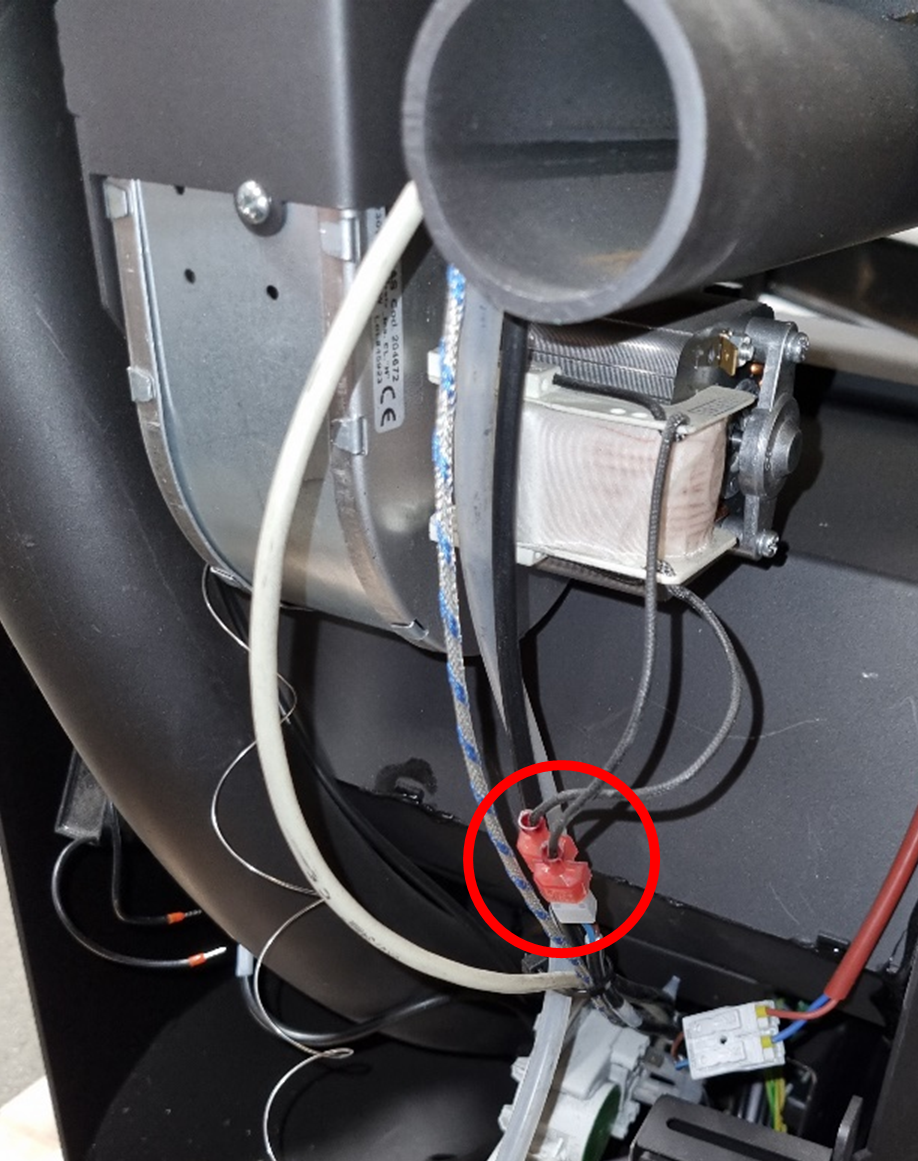
- Disconnect the two cables to the fan:
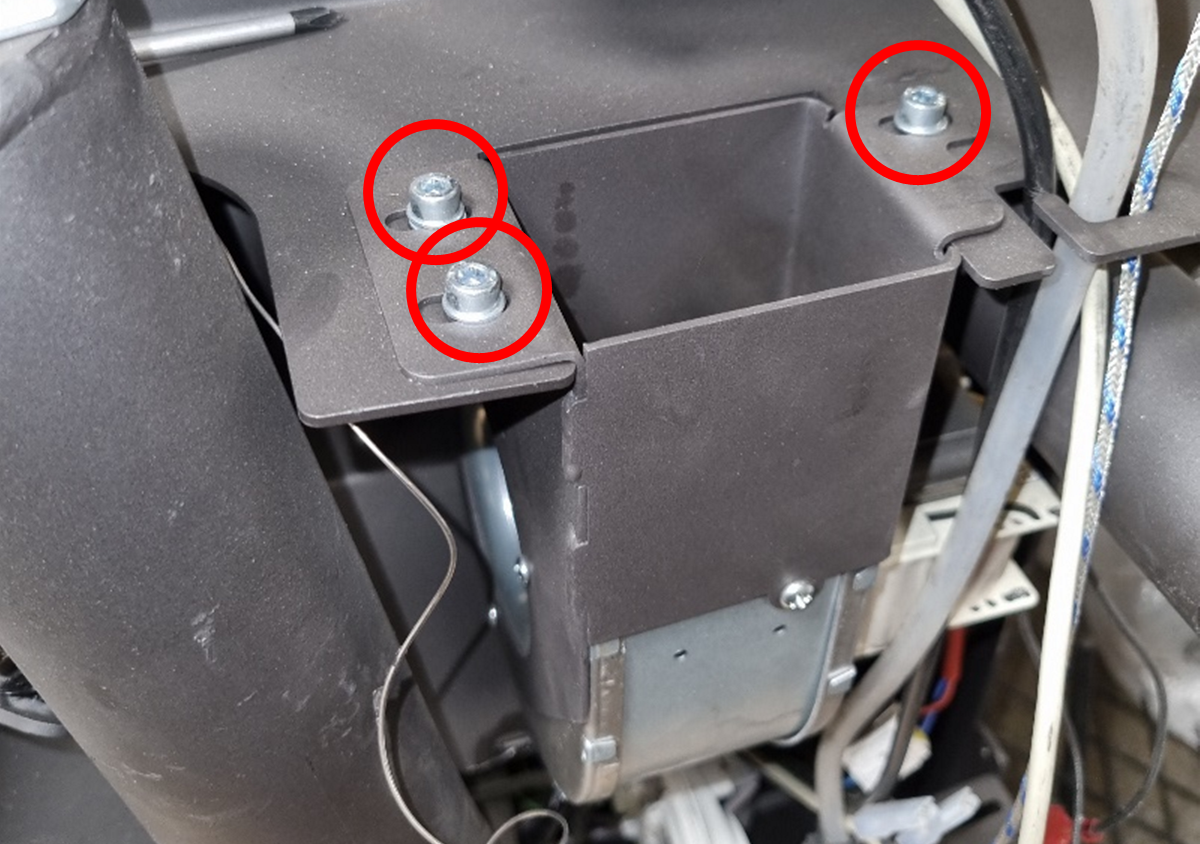
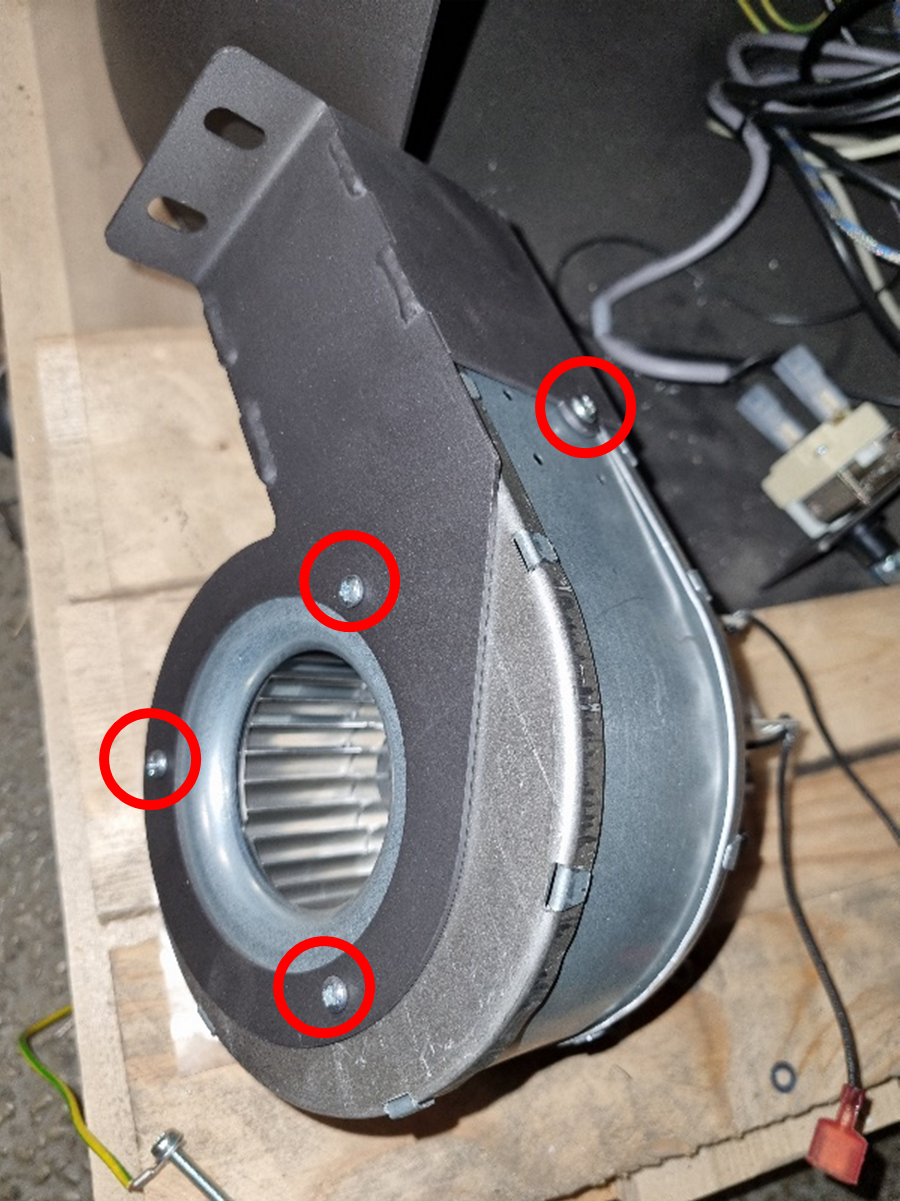
- Remove the three screws which holds the fan bracket in place, then remove the fan assembly:
- Now remove the four screws which attaches the bracket to the fan:
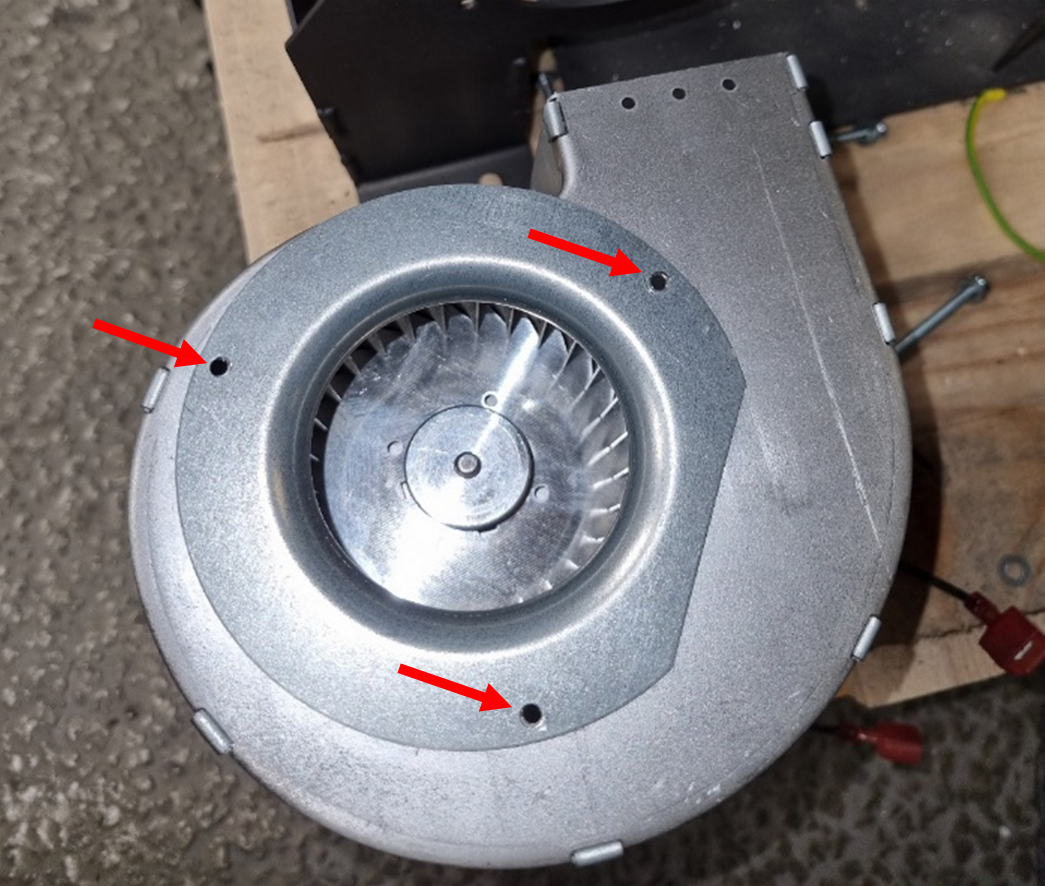
- Before mounting the bracket to the new fan, make sure that the holes in the fan’s air duct align with the holes in the fan’s cover plate. The cover plate can be rotated:
- Reattach the fan bracket to the fan, and screw in the screws as shown in point 4.
- Remount the fan bracket with the new fan to the stove by screwing the three screws back in place as shown in point 3.
- Reattach the cables as shown in point 2.
- Check the function of the new fan by performing an ignition while keeping an eye on the fan. If the fan turns on/start spinning, the installation is successful.
- Remount the stove’s backplate with the four screws to complete the installation.
Troubleshooting
If the fan does not spin:
- Make sure the power is turned on.
- Check that there is no damage to the wires.
- Make sure both cables are connected to the fan, but also to the control board.
- The fan might need more power. Try setting the fan speed a bit higher than the recommended minimum via the service menu on your remote.